Hi Everyone,
I'm new here and joined so you guys can help me repair a kyusu that was sent to me from a friend in Japan.
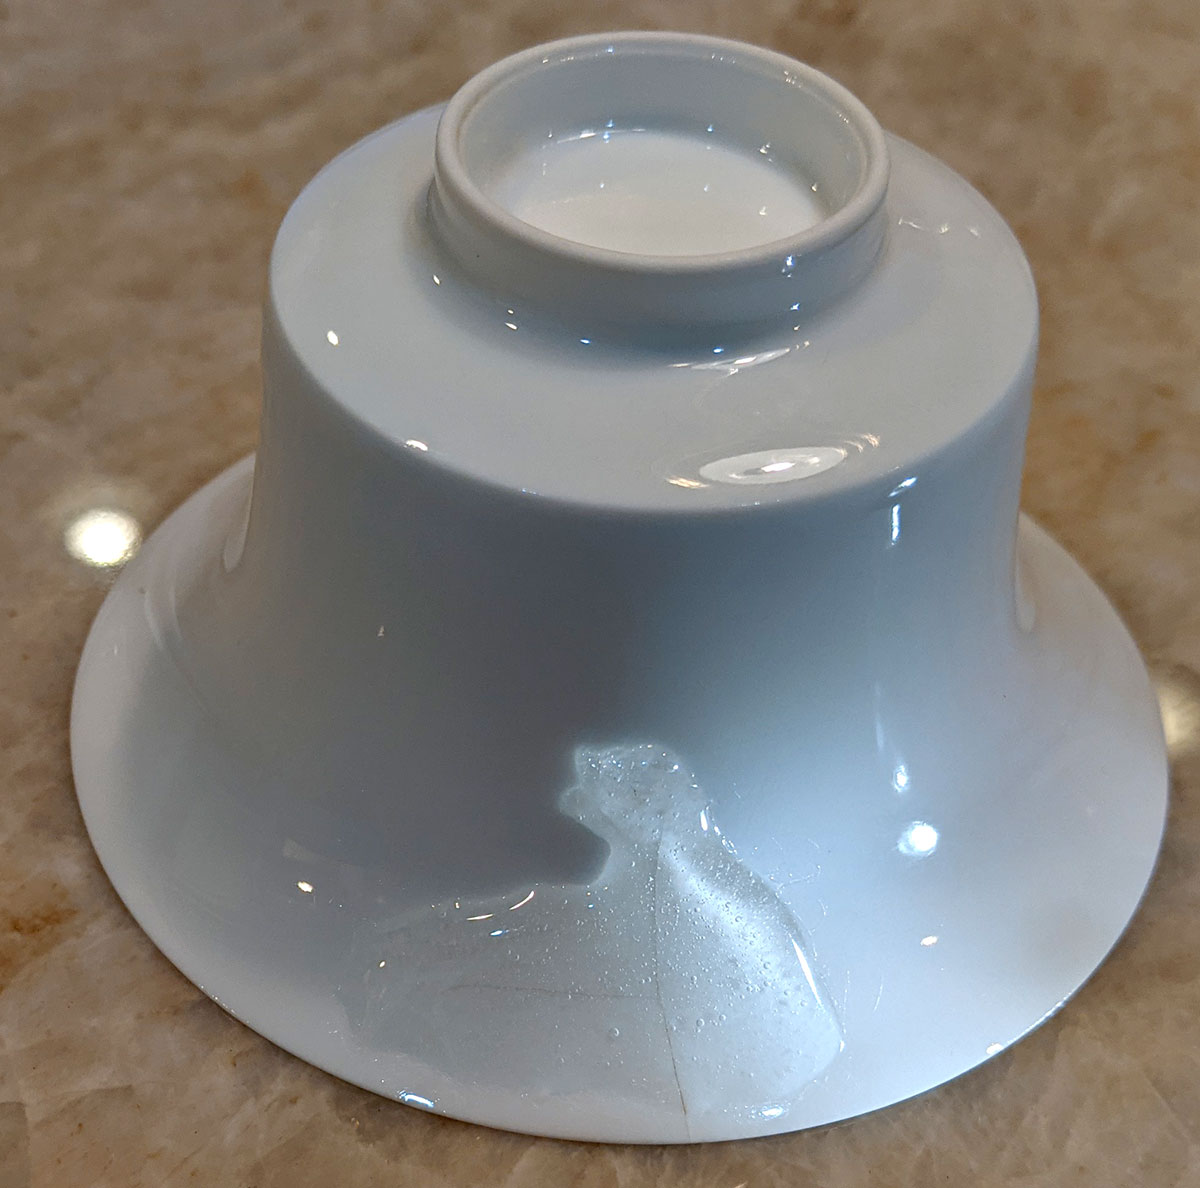
We paid for safe delivery with FedEx and everything was bubble-wrapped however the animals handled the parcel poorly and it arrived damaged. There is a crack as shown in the attachments and it leaks.
Are there any ways to fix this and make the teapot usable again?
The pot its unglazed clay from tokoname so any repair techniques I found online are doubtful. Epoxy resin or anything like that is no good due to toxicity, maybe silicone can provide a solution?
Kintsugi is expensive and I don't think is required from the moment that the pot is not completely broken. I found a solution with milk but looks doubtful as the clay is porous resulting in spoiling the material therefore the future brews.
Any suggestions would be extremely helpful.
Many thanks in advance,
Max
How to repair cracks on a handmade tokode kyusu?
- Attachments
-
- 187038760_304539171261969_5624551661614197012_n.jpg (142.06 KiB) Viewed 3355 times
-
- 188091006_509581486736120_3845596320291653163_n.jpg (164.77 KiB) Viewed 3355 times
-
- 187655655_384955496079942_4214523371321875093_n.jpg (32.77 KiB) Viewed 3355 times
-
- 187655439_501710010876642_1797833860268503774_n.jpg (41.99 KiB) Viewed 3355 times
-
- 187193520_323305036016369_2326643464790530324_n.jpg (31.1 KiB) Viewed 3355 times

if you want a good result, i suggest practicing first. good repairs won't happen without practice. you need to be very familiar with the materials you work with and how they behave.
there are two issues that need addressing:
carefully mask off the exterior of the pot leaving only the crack itself exposed -- aim for less than 1mm of bleed around the crack. next, apply a thin layer of silicone and press it into the crack, especially where light was shining through. don't apply too much, and use a plastic card or something to wipe the joint smooth. aim to have the silicone as flush as possible with the ceramic surface. since silicone is compliant, and epoxy is not, you need to minimize the exposed silicone so you don't compromise the structure. also, epoxy doesn't adhere well to silicone.
once it cures, remove the masking. use a razor to score along the edge of the masking (on both sides of the crack) before peeling it off so you don't tear the silicone.
at this point, you should have a thin bead of silicone over the crack itself. the larger gaps inside the crack interface are also filled, and the pot should be watertight.
next, liberally apply epoxy on and around the crack on the exterior of the pot. i suggest waiting until the product cures a little bit so you can apply it when it's very viscous. otherwise, it won't stay where you want it. it will run.
also, since the bottom of your pot is flat, you need to deal with wobble. design it so you have three points of contact since that is inherently wobble-free. you might have to add a blob or two of epoxy to an undamaged area to achieve this.
an example with clear epoxy:
you could apply it a little more carefully than that if you want, but make sure it's applied thickly and broadly enough for good rigidity.
there are two issues that need addressing:
- structural integrity
- epoxy or stapling will work, but if you don't want to do kintsugi, i'm guessing stapling is also out of the question. silicone is not suitable for reinforcing the structure.
- watertightness
- i think that limiting internally exposed surface area of the adhesive is a good idea, especially if you aren't comfortable with the materials used.
- it sounds like you are comfortable with liquid contact with silicone but not epoxy, so a creative solution could be to use silicone first...
carefully mask off the exterior of the pot leaving only the crack itself exposed -- aim for less than 1mm of bleed around the crack. next, apply a thin layer of silicone and press it into the crack, especially where light was shining through. don't apply too much, and use a plastic card or something to wipe the joint smooth. aim to have the silicone as flush as possible with the ceramic surface. since silicone is compliant, and epoxy is not, you need to minimize the exposed silicone so you don't compromise the structure. also, epoxy doesn't adhere well to silicone.
once it cures, remove the masking. use a razor to score along the edge of the masking (on both sides of the crack) before peeling it off so you don't tear the silicone.
at this point, you should have a thin bead of silicone over the crack itself. the larger gaps inside the crack interface are also filled, and the pot should be watertight.
next, liberally apply epoxy on and around the crack on the exterior of the pot. i suggest waiting until the product cures a little bit so you can apply it when it's very viscous. otherwise, it won't stay where you want it. it will run.
also, since the bottom of your pot is flat, you need to deal with wobble. design it so you have three points of contact since that is inherently wobble-free. you might have to add a blob or two of epoxy to an undamaged area to achieve this.
an example with clear epoxy:
you could apply it a little more carefully than that if you want, but make sure it's applied thickly and broadly enough for good rigidity.
Thanks for reaching out,
I completely agree with your approach especially regarding rigidity however I 'm not sure. I don't know if all this will result in making the teapot toxic especially inside where the tea is brewed. Don't know how safe silicone and epoxy really is .. I found another way with urushi but it requires some steps that look very difficult and I can find to purchase urushi anywhere. Thanks again
I completely agree with your approach especially regarding rigidity however I 'm not sure. I don't know if all this will result in making the teapot toxic especially inside where the tea is brewed. Don't know how safe silicone and epoxy really is .. I found another way with urushi but it requires some steps that look very difficult and I can find to purchase urushi anywhere. Thanks again

The tricky part is that often for some glue-back-together-repairs to actually work, you would need to completely break it first… Urushi you can find in Kintsugi repair sets, plenty of sources online, just need to be a traditional set not the epoxy gold glitter rainbow unicorn repair sets 
I wouldn’t recommend it though for extensive body damage. It’s not gonna hold forever.
I wouldn’t recommend it though for extensive body damage. It’s not gonna hold forever.
i won't try to convince you on the safety. it's smart to research and come to your own conclusions.Maximos93 wrote: ↑Tue May 18, 2021 4:36 pmI don't know if all this will result in making the teapot toxic especially inside where the tea is brewed. Don't know how safe silicone and epoxy really is .. I found another way with urushi but it requires some steps that look very difficult and I can find to purchase urushi anywhere. Thanks again
however, if you're comfortable with urushi-liquid contact, maybe you could try an approach like i outlined in my last post but substituting urushi for silicone. i.e. do a thin layer of urushi pressed into the crack, and then do a lot of epoxy on top of that.