thanks for posting good pics.
great news -- that's one of the best ways you can break a teapot. it's a clean break with only one piece to glue. also, the break is all external (nothing touching liquid).
i would use an epoxy like JB-Weld ClearWeld:
https://www.jbweld.com/product/clearweld-syringe
if you do not have experience working with epoxy or with gluing things in general, here are some tips:
before you apply the glue, practice assembling the broken pieces. do this many times. for really important things, i practice 10 times in a row or more. depending on the break interface, sometimes perfect assembly isn't crisp and obvious by feel. visually examine it and run your fingernail over the interface. when you're ready, you should be able to quickly get perfect alignment without fiddling and tweaking.
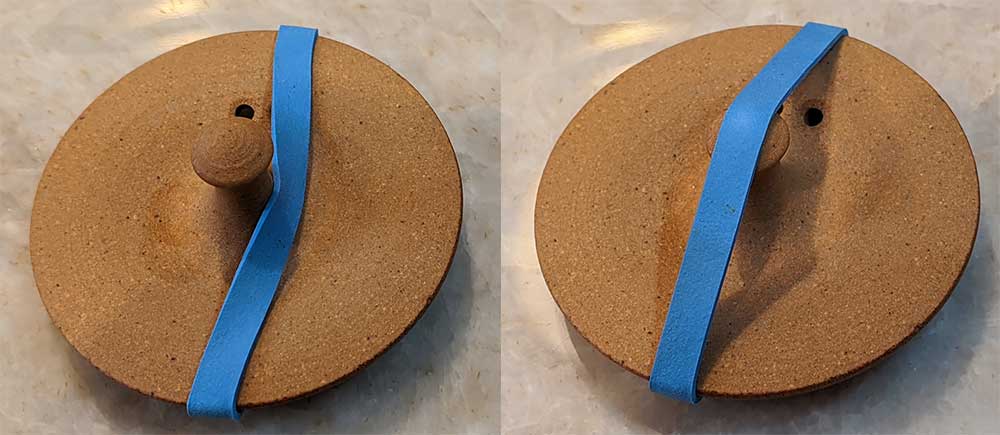
if possible, clamp the workpiece while the glue cures. in this case, you should be able to easily do that with a rubberband. again, practice before gluing and make sure the rubberband is stable and doesn't bring the pieces out of alignment. you don't want any surprises when you actually glue it. i suggest leaving the rubberband on the lid and practice just slightly repositioning the band to clamp the knob.

- Lid repair: rubberband clamp
- rubberband_lid_clamp.jpg (50.31 KiB) Viewed 12553 times
for the glue, dispense it onto thick paper. you can use a magazine cover or a glossy piece of junk mail or something.
be very careful to dispense equal amounts of both parts of the glue. if you don't, the chemical ratio will be off, and the glue may not cure correctly. this can result in reduced bond strength, lasting tackiness, and enduring chemical odor. the dual-syringe helps with that, but sometimes one side of the syringe starts dispensing before the other one, so pay attention. for this reason, dispense at least a nickel-sized portion. there should be unused glue at the end, and that's ok. save the unused remainder of the blob and monitor it over time. you can use it to retroactively verify that you did a good job. when it fully cures, the entire thing (including the edges) should be firm and odorless. you may also observe that it continues to harden over a period of several days. after 24h, you may be able to dent it with your fingernail, but after many more days, that may no longer be the case.
it's also critical to mix it up very thoroughly with a toothpick. you should spend a solid two minutes mixing it. be sure to incorporate the edges of the blob. use a second toothpick to scrape potentially unmixed glue off of the first toothpick and mix that back into the blob.
before you glue your teapot, practice preparing the epoxy and check it the next day. is the blob totally solid and odorless? practice, practice, practice. see a theme here?

the epoxy i recommended sets up in about 5 minutes depending on temperature. you can use this to your advantage. sometimes letting it thicken up a little before application makes things easier.
finally, try to avoid bleedout due to excess glue. if minor bleedout happens, i recommend just waiting until it cures, and then you can carefully remove the bead with a razor blade.
 I love this pot so much.